Embedding our Unified Payment Flow (UPF) in your app or site
Feature Preview Notice: This documentation includes details about functionality that is not yet available in the production API. Until it is available, create your payment form using our hosted fields.
The AffiniPay Unified Payment Flow javascript library (UPF) is a pre-built payment form that you can embed into your website. With UPF, you can take one-time or scheduled payments from customers through AffiniPay securely using any of our accepted payment methods (Credit Card, eCheck, and Pay Later), with no need to manage any transaction details yourself.
Surcharge
UPF Checkout comes with Surcharging functionality built in. To set up surcharging with UPF, please contact AffiniPay Support. Once set up, UPF will automatically add surcharge to any transaction if the payment method used supports it. Be sure to adhere to the rules around surcharge.
Security and CAPTCHA
UPF Checkout comes with a built-in CAPTCHA solution to prevent card testing from malicious actors or bots from creating fake transactions. If our backend payment systems detect that UPF Checkout is being used by a bad actor on your page, a CAPTCHA puzzle will be shown to force the user to prove they are real before being able to submit transactions through your integration. This requires no additional setup for you besides the general integration steps listed above.

This type of integration requires a partner OAuth application. If you do not have a partner OAuth application (for example, if you are a merchant), contact AffiniPay Support.
You must contact AffiniPay Support and provide AffiniPay with the Domain Name on which you will be hosting UPF.
UPF should be integrated into your site by a developer. This integration requires web developer skills as well as the ability to generate short-lived JSON Web Tokens (JWT) used for authentication with AffiniPay from your backend server. If you have questions about how to integrate with UPF, contact AffiniPay Support.
To create a payment page using UPF:
- Generate a short lived JWT for authentication to pass to your HTML frontend
- Get the deposit bank account ID to deposit the payment into
- Add a reference to the UPF javascript library in your HTML header
- Add the UPF Checkout HTML tag to your HTML body
- Add optional UPF fields and properties
- Listen to UPF events
UPF versioning
The AffiniPay UPF Checkout Javascript library is versioned. The versioning URL is:
https://cdn.affinipay.com/upf-checkout/<version>/main.<hash>.bundle.js
For example, the URL for version 0.0.82 is:
https://cdn.affinipay.com/upf-checkout/0.0.82/main.ba238c3dba4048a1e650.bundle.js
For SRI and integrity attribute purposes, here is the full script tag with the SHA384 digests:
<script
src="https://cdn.affinipay.com/upf-checkout/0.0.82/main.ba238c3dba4048a1e650.bundle.js"
integrity="sha384-qSGaP1M5UeR9pPdirSdeWFhQv15927HLBXV/XM4IAnnlZxnwQhjXddX9QRErSJF5"
crossorigin="anonymous">
</script>1: Generate a short lived JWT for authentication to pass to your HTML frontend
To authenticate UPF in your website with AffiniPay, you must generate a short lived JSON Web Token (JWT) with the correct scopes using the OAuth Token Exchange Flow.
To do this, call the /v2/oauth/token AffiniPay API endpoint with the following body:
curl -X POST -H "Content-Type:application/json" https://api.affinipay.com/v2/oauth/token -d '
{
  "subject_token": "<access_token>",
  "subject_token_type": "urn:ietf:params:oauth:token-type:access_token",
  "grant_type": "urn:ietf:params:oauth:grant-type:token-exchange",
  "scopes": "charge payment_methods upf"
}'The access_token in this request is for a specific AffiniPay merchant. For more information on this type of access token, see Connecting current merchants and Connecting new merchants. The response looks like this:
{
    "access_token": "{{ encoded_merchant_jwt }}",
    "token_type": "Bearer",
    "expires_at": 1717008100,
    "expires_in": 600,
    "scope": "charge payment_methods upf",
    "created_at": 1717007500
}
This generates a response access_token in the form of a JWT, which is short-lived and expires in 10 minutes. The scope of the generated token is limited to just the actions UPF needs to perform. Any attempt to use this token to access any AffiniPay APIs other than those UPF needs to function will fail because the access_token is not authorized to make those requests.
You will use the encoded_merchant_jwt in the response to call the bank accounts API and in your payment page to authenticate UPF.
2: Get the deposit bank account ID to deposit the payment into
Next, get the ID for the bank account into which payment will be deposited. Use the /v2/merchants/<mid>/relationships/bank-accounts AffiniPay API, passing the encoded_merchant_jwt as the bearer token for authorization. To retrieve the merchant ID, decode the JWT and use the mid field on the decoded JWT.
Here is an example of decoding the JWT in javascript using the jwt-decode library:
import { jwtDecode } from 'jwt-decode';

const token = "eyJ0eXAiO..."  /// encoded_merchant_jwt";
const decodedToken = jwtDecode(token);

console.log(decodedToken.mid); // merchant ID
All popular programming languages have a library to decode JWTs (or it is exposed as built-in functionality in the language). For a full list of support, see this list.
After decoding the JWT and retrieving the mid, call the bank accounts API.
curl -X GET -H "Authorization: Bearer <encoded_merchant_jwt>" https://api.affinipay.com/v2/merchants/<mid>/relationships/bank-accountsThe response will contain an array of bank accounts for that merchant within the data field:
{
    "data": [
        {
            "type": "bank_account",
            "id": "0ojg5y7zCFCGKNoGWkGmF7",
            "attributes": {
                "description": "Operating Bank Account 1234",
                "account_number_last4": "1234",
                "currency": "usd",
                "payout_speed": "standard",
                "routing_number_last4": "3123",
                "bank_account_type": "checking",
                "iolta_trust": false
            },
            "relationships": {
                "legal_entity": {
                    "data": {
                        "type": "legal_entity",
                        "id": "12tNMtZTmBD37U7B05SMH0"
                    }
                },
                "merchant": {
                    "data": {
                        "type": "merchant",
                        "id": "6EmhWj6rWuEciYTw9o1WR3"
                    }
                }
            },
            "meta": {
                "archived": false,
                "version": 1
            }
        }
    ]
}
Determine which bank account in the array you want for depositing payments taken from within UPF and note its ID, which you will pass to the frontend UPF web component.
3: Add a reference to the UPF javascript library in your HTML header
On your payment page, add a reference to the AffiniPay UPF Checkout library in the <head> tag of your page. Optionally, you can include the integrity and crossorigin=’anonymous’ properties to verify the script’s origin.
<head>
  <script src="https://cdn.affinipay.com/upf-checkout/0.0.82/main.ba238c3dba4048a1e650.bundle.js"
integrity="sha384-qSGaP1M5UeR9pPdirSdeWFhQv15927HLBXV/XM4IAnnlZxnwQhjXddX9QRErSJF5"
crossorigin="anonymous"></script>
</head>4: Add the UPF Checkout HTML tag to your HTML body
In the HTML body of your payment page, add the <upf-checkout> HTML tag where you want the AffiniPay payment methods component to display on the payment page.
<body>
  // rest of html
  <upf-checkout
    token="{{ encoded_merchant_jwt }}"
    amount="1000"
    public-key="{{ merchant_public_key }}"
    bank-account-id="{{ bank_account_id }}"
  ></upf-checkout>
</body>There are four required fields to pass to the upf-checkout web component:
token. The JWT generated in the previously. (type:string)amount. The amount to charge, in terms of the currency’s smallest unit. For USD, this is the amount in cents. The maximum value is 10^14 - 1. (For example,1000would be equal to $10.00.) (type:string)public-key. The public key for the merchant account for which you’re taking payment. (type:string)bank-account-id. The ID of the bank account where funds will be deposited, which we fetched in the last step. UPF uses this ID to generate the accepted payment methods for that bank account to show the user. (type:string)
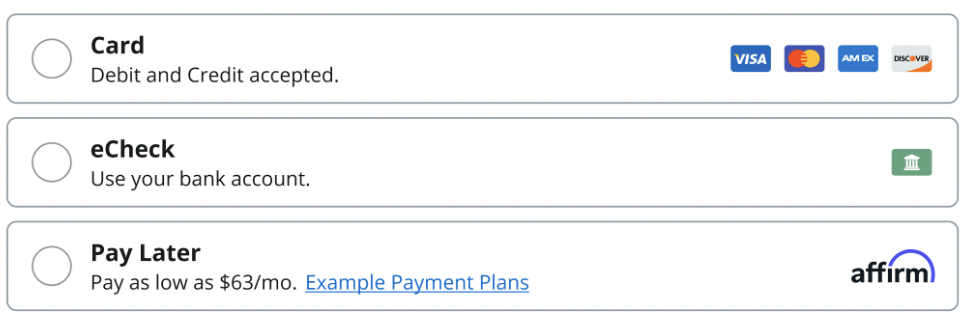
When your page loads, you should see the UPF Checkout web component, which will look similar to this, depending on the bank account’s accepted payment methods:
5: Add optional UPF fields and properties
Each of these fields can be optionally passed to the <upf-checkout> HTML tag as HTML attributes to customize how UPF works:
reference. A string reference provided when creating the Charge. This field is not used by the AffiniPay Payment Gateway, but may be used by Merchant systems for correlation with invoices, etc. Maximum length is 128 characters. (type:string)test-mode. A boolean field that switches UPF to use test mode. When test mode istrue, transactions won’t actually be submitted to the payment processing networks. Note that for test mode to work correctly, the bank account passed to UPF must be linked to test credit card and ACH payment methods. (type:boolean, defaults tofalse)submit-disabled. A boolean field that fully disables the submit button within the UPF web component, regardless of any internal logic of UPF. When this istrue, the end customer will not be able to submit a payment. For example, this could be used if you need to temporarily stop the user from submitting a transaction while an API call outside of UPF Checkout is loading. (type:boolean, defaults tofalse)errors. A string of errors that causes the transaction to be blocked from submitting to the payment processor, and the errors to be shown to the user when they attempt to submit a transaction. For example, this could be used if a required input field in your payment page outside of UPF Checkout was not filled in by the user. (type:string)surcharge-disabled. A boolean field that fully disables surcharge from being applied to a transaction whentrue, even if it is enabled on the payment methods for a bank account. Note that surcharge is enabled by default in UPF if the selected payment method supports it. (type:boolean, defaults tofalse)disabled-fields. A comma-separated string of input field names within UPF that will be disabled when present. Valid options are”postalCode,email,address1,address2,city,state,country,name,givenName,surname,holderName”. Note thatnameis used for any payment method’s form where there is a single name input (Card, Pay Later), whilegivenName,surname, andholderNameare used for the eCheck form for either personal or business ACH. (type:string)disabled-payment-methods. A comma-separated string of payment methods to disable for the user, even if the bank account supports it. For example, if you don’t want to show eCheck or Pay Later as valid payment methods in some scenarios you could hide them with this field. Valid options are “credit_card,ach,loan” (type:string)source-id. The URI that uniquely identifies a transaction in the caller’s environment. Attempts to create another transaction with the samesource-idwill result in an HTTP 409 with error coderesource_exists. The recommended format ispartnername:id. For example, if the partner’s name is MyPartner, a source ID for a contact might beMyPartner:contact-12345. (maximum length is 255 characters, must be unique to calling merchant) (type:string)
Complex optional fields
Since HTML tags can only take in string attributes, some optional functionality of UPF that requires object or array types uses javascript object properties instead. Here is an example of how to use a property within UPF:
<head>
  <script src="https://cdn.affinipay.com/upf-checkout/0.0.82/main.ba238c3dba4048a1e650.bundle.js"
integrity="sha384-qSGaP1M5UeR9pPdirSdeWFhQv15927HLBXV/XM4IAnnlZxnwQhjXddX9QRErSJF5"
crossorigin="anonymous"></script>
  <script>
    document.addEventListener('UPFLoadSuccess', function (event) {
      var upf = document.querySelector('upf-checkout')
      upf['default-fields'] = { 'name': 'test', 'email': 'test@example.com' };
    });
  </script>
</head>
<body>
  <upf-checkout
    // rest of attributes
  ></upf-checkout>
</body>UPF complex optional properties include:
default-fields. A javascript object that sets default values for the various inputs within UPF (type:Object<string,string>). You can use this to “pre-fill” form inputs within UPF Checkout to speed up the process for the user. For example, if you already know the user’s email, you can set it for them. Here is the full list of available fields:{ name: string, // for payment methods that have one name field (Card, Pay Later) givenName: string, // for eCheck personal ACH first name surname: string, // for eCheck personal ACH last name holderName: string, // for eCheck business ACH account holder name address1: string, address2: string, city: string, state: string, postalCode: string, country: string, email: string }custom-data. A javascript object that allows you to attach any custom data to the created transaction. After the transaction is created, any fields you include here will be saved to the data field on the charge (type:Object<string,any>)recurring-data. A javascript object that enables you to use UPF in recurring charge mode. When this is present, the transaction created will be the first transaction in a set schedule of transactions that collect automatically up to a certain date or amount. For more information on recurring transactions, refer to the API Reference. This field takes the exact same parameters as therecurJSON field that can be used when creating a charge with recurrence using AffiniPay’s Payment Gateway API to customize the exact details of the scheduled payment.
6: Listen to UPF events
While the UPF Checkout javascript library handles the end-to-end tokenization and payment flow, you may want to be notified when something happens within UPF, such as when a successful payment occurs so you can navigate the user to a thank you page or when there is an issue submitting a payment. To do this, UPF emits Custom Events for various actions that UPF is taking.
The events UPF emits are browser-only events that your frontend HTML page can listen and react to, not webhooks that backend systems can listen to. To subscribe to webhook events, see our webhook documentation.
To subscribe to an event UPF emits on your payment page, set up an Event Listener in your payment page’s <script> tag to be notified when an event occurs. Some events also have a detail field with more information on the event that can be accessed with event.detail. For example:
<head>
  <script>
  document.addEventListener('UPFChargeSuccess', function (event) {
  	console.log(event.detail)
  	// do whatever you want with the event
  });
  </script>
</head>The full list of events that UPF emits with corresponding detail fields includes:
UPFLoadSuccess. Emitted when the UPF javascript library successfully attaches and loads its needed script tags, and is mounted to the HTML DOM.detail:undefined
UPFLoadFailure. Emitted when the UPF javascript library fails to attach and load its needed script tags. This can sometimes be caused by adblockers or content blockers running on the page that prevent UPF from loading its own scripts.detail:undefined
UPFRenderSuccess. Emitted when the UPF web component is successfully rendered into the DOM. Note: This event fires every time anything causes the UPF web component to re-render, which will happen very often. Only use this when developing and testing your UPF integration to verify it is working correctly.detail:undefined
UPFRenderFailure. Emitted when the UPF web component fails to render correctly. This can happen if the<upf-checkout>HTML tag is missing required attributes described in the “Add the UPF Checkout HTML tag to your HTML body” section or if UPF encounters an error when calling internal AffiniPay APIs.detail: Array of string error messages describing the cause of the error (string[]). For example:
[ "UPF is missing required attributes: token, amount" ]UPFChargeSuccess. Emitted when a user successfully makes a transaction using UPF.detail: AffiniPay Charge object. For example:
{ "id": "wKgFnjz8GamBPPzKzIsAAA", "type": "CHARGE", "account_id": "wKgFeDz5HF-BPPl08dcADQ", "status": "AUTHORIZED", "amount": 100, "currency": "USD", "auto_capture": true, "amount_refunded": 0, "authorization_code": "RLQMEA", "method": { "type": "card", "number": "************4242", "fingerprint": "GunPelYVthifNV63LEw1", "card_type": "VISA", "exp_month": 10, "exp_year": 2025, "name": "Some Customer" }, "cvv_result" : "MATCHED" }UPFChargeFailure. Emitted when a user’s transaction attempt fails. This can happen due to internal UPF validations failing (like for an invalid postal code) or for the payment processor rejecting the transaction due to an issue with the payment method (such as an invalid card number or insufficient funds).detail. Array of string error messages describing the cause of the error (string[])
[ "This card transaction has been declined by the bank. Please call the phone number on the back of the card to resolve the issue and then retry your payment." ]UPFPaymentMethodChange. Emitted when the user selects a payment method within UPF.detail. Object containing information on the newly selected payment method. Note that allnumberfields are in terms of the currency’s smallest unit. ForUSD, this will be cents.
{
  "paymentMethod": 'credit_card' | 'ach' | 'loan',
  "surchargeTotal": number,
  "amount:": number,
  "totalAmount": number
  "surchargePercent": string, // string representation of percent surcharge fee if present, e.g. `4.5` for 4.5%
  "surchargeFee": string, // string representation of flat surcharge fee if present, e.g. `4` for $4.00
  "surchargeLabel": string // custom label set for surcharge on selected payment method
}
Note that not all fields are always present, depending on surcharge configuration for the selected payment method. For example:
{ "paymentMethod": "credit_card", "surchargeTotal": 200, "amount:": 1000, "totalAmount": 1200 "surchargePercent": "3.5", "surchargeLabel": "Credit Card Processing Fee" }UPFChallengeRequested. Emitted when the user is directed to solve a CAPTCHA puzzle due to our backend systems flagging the user as a potential malicious actor when they try to submit a transaction through UPF Checkout.detail:undefined
UPFChallengeSuccess. Emitted when the user successfully fills out a CAPTCHA puzzle after being directed to it.detail:undefined
Basic Code Example (Native Javascript + HTML)
Here is a basic example of how to use UPF within a website utilizing native javascript and HTML. This example does not use any of the advanced options available within UPF, it will just create a $20.00 transaction for the merchant’s deposit bank account when submitted.
<head>
   <script src="https://cdn.affinipay.com/upf-checkout/0.0.82/main.ba238c3dba4048a1e650.bundle.js"
integrity="sha384-qSGaP1M5UeR9pPdirSdeWFhQv15927HLBXV/XM4IAnnlZxnwQhjXddX9QRErSJF5"
crossorigin="anonymous"></script>

  <script>
    document.addEventListener('UPFChargeSuccess', function (event) {
	console.log(event.detail);
    });

    document.addEventListener('UPFChargeFailure', function (event) {
	console.log(event.detail);
    });

  </script>
</head>
<body>
  <upf-checkout
    token="<redacted>"
    public-key="<redacted>"
    amount="2000"
    bank-account-id="2BBo6wn63Mo8aWH3Ccok5T"
  ></upf-checkout>
</body>
Advanced Code Example
Here is a more advanced example of how to use UPF within a website utilizing native Javascript and HTML. This example will create a $20.00 transaction when the user clicks submit with a scheduled payment that will run monthly on the 15th of each month up to a max amount of $500. Additionally, it sets some default fields, custom fields, and some event listeners to console log any successful or unsuccessful charge attempts.
<head>
   <script src="https://cdn.affinipay.com/upf-checkout/0.0.82/main.ba238c3dba4048a1e650.bundle.js"
integrity="sha384-qSGaP1M5UeR9pPdirSdeWFhQv15927HLBXV/XM4IAnnlZxnwQhjXddX9QRErSJF5"
crossorigin="anonymous"></script>

  <script>

    document.addEventListener('UPFLoadSuccess', function (event) {
      var upf = document.querySelector('upf-checkout')
      upf['default-fields'] = {
        'name': 'test',
        'email': 'test@tester.com'
      };
      upf['custom-data'] = {
        'field1': ['first entry', 'second entry'],
        'field2': 'testing123'
      };
      upf['recurring-data'] = {
	 'interval_unit': 'MONTH',
        'interval_delay': 1,
        'start': '2023-12-15',
        'days': ['15'],
        'max_amount': 5000
      };
    });

    document.addEventListener('UPFPaymentMethodChange', function (event) {
	console.log(event.detail);
    });

    document.addEventListener('UPFChargeSuccess', function (event) {
	console.log(event.detail);
    });

    document.addEventListener('UPFChargeFailure', function (event) {
	console.log(event.detail);
    });

  </script>
</head>
<body>
  <upf-checkout
    token="<redacted>"
    public-key="<redacted>"
    amount="2000"
    bank-account-id="2BBo6wn63Mo8aWH3Ccok5T"
    reference="Transaction 123"
    surcharge-disabled="true"
    disabled-fields="address2,email"
    submit-disabled="false"
    disabled-payment-methods="ach,loan"
    test-mode="true"
    errors=""
    source-id="MyPartner:contact-12345"
  ></upf-checkout>
</body>
Code Example (React + typescript)
// index.tsx

export const loadScript = (script: string): void => {
  const scriptEl = document.createElement('script');
  scriptEl.setAttribute('src', script);
  document.getElementsByTagName('head')[0].appendChild(scriptEl);
};

loadScript('https://cdn.affinipay.com/upf-checkout/0.0.82/main.ba238c3dba4048a1e650.bundle.js');


ReactDOM.render(
  <App />,
  document.getElementById('root') as HTMLElement
);
// App.tsx

const App = () => {
  const [amount, setAmount] = useState<string/>,('0');
  const [reference, setReference] = useState<string/>,('');
  const [customDataField, setCustomDataField] = useState<string/>,('');
  const [testMode, setTestMode] = useState<boolean/>,(false);
  const upfRef = useRef<HTMLElement>,();

  // these can also be split up into separate useEffects per event type if needed
  useEffect(() => {
    const listenerCallback = (e: CustomEvent) => {
      console.log(`App received UPF event: ${e.type}`, { detail: e.detail});
    };
    document.addEventListener('UPFChargeSuccess', listenerCallback);
    document.addEventListener('UPFChargeFailure', listenerCallback);
    document.addEventListener('UPFPaymentMethodChange', listenerCallback);

    return () => {
      document.removeEventListener('UPFChargeSuccess', listenerCallback);
      document.removeEventListener('UPFChargeFailure', listenerCallback);
      document.removeEventListener('UPFPaymentMethodChange', listenerCallback);
    };
  }, []);

  useEffect(() => {
    // react ref allows us to modify the properties of the UPF object directly
    upfRef.current['custom-data'] = { upfCustomDataKey: customDataField };
  }, [customDataField]);

  useEffect(() => {
    upfRef.current['default-fields'] = {
      'name': 'test',
      'email': 'test@tester.com'
    };
  }, []);

  const onAmountChange = (e) => {
    const { value } = e.target;
    setAmount(value);
  };

  const onReferenceChange = (e) => {
    const { value } = e.target;
    setReference(value);
  };

  const onCustomDataFieldChange = (e) => {
    const { value } = e.target;
    setCustomDataField(value);
  };

  const toggleTestMode = () => {
    setTestMode(prevTestMode => !prevTestMode);
  };

  return (
    <>
      <div>
        <label for='amount'>Amount (in cents)</label>
        <input
          value={amount}
          id='amount'
          onChange={onAmountChange}
          type='number'
          min='0'
        />
      </div>
      <div>
        <label for='reference'>Reference</label>
        <input
          value={reference}
          id='reference'
          onChange={onReferenceChange}
          type='text'
        />
      </div>
      <div>
        <label for='custom-data'>UPF Custom Data Field</label>
        <input
          value={customDataField}
          onChange={onCustomDataFieldChange}
          id='custom-data'
          type='text'
        />
      </div>
      <div>
        <button
          onClick={toggleTestMode}
          type='button'
        >
          {testMode ? 'Disable' : 'Enable'} Test Mode
        </button>
      </div>
      <upf-checkout
        amount={amount}
        public-key="<redacted>"
        bank-account-id="<redacted>"
        token="<redacted>"
        reference={reference}
        test-mode={testMode}
        ref={upfRef}
      />
    </>
  );
};

export default App;

// type declarations for upf web component if using typescript with react
// upf-checkout.d.ts

declare module React.JSX {
  interface IntrinsicElements {
    'upf-checkout': {
      amount: string,
      'public-key': string,
      'bank-account-id': string,
      token: string,
      'submit-disabled'?: boolean,
      'surcharge-disabled'?: boolean,
      reference?: string,
      errors?: string,
      'test-mode'?: boolean,
      'disabled-fields'?: string,
      'disabled-payment-methods'?: string,
      'source-id'?: string,
      ref?: React.Ref<HTMLElement>
    }
  }
}